Steampunk, the genre that seamlessly blends retro-futuristic fashion, accessories, and home decor, offers endless opportunities for creativity. With its distinct and edgy aesthetic, steampunk crafts often incorporate unconventional materials to bring unique flair to projects. From brass and leather to metal and antiques, steampunk enthusiasts love experimenting with a wide range of innovative materials.
In this section, we’ll delve into five easy DIY steampunk projects that showcase the use of these extraordinary materials. Each project will demonstrate how you can incorporate them to infuse a touch of steampunk into your crafts, transforming them into one-of-a-kind masterpieces.
Key Takeaways:
- Steampunk crafts embrace unconventional materials to create unique projects.
- Experimenting with materials like brass, leather, and metal adds an edgy and retro-futuristic touch to steampunk crafts.
- By using innovative materials, steampunk enthusiasts can push the boundaries of creativity and bring their ideas to life.
- These five easy DIY projects offer inspiration and guidance for incorporating unique materials in your own steampunk crafts.
- Elevate your crafting skills and create one-of-a-kind steampunk pieces with a touch of mystery and individuality.
Time Distorting Device
Create your own handheld time travel device with simple materials like wood, leather, and metal odds and ends. This steampunk art project allows you to experiment with different textures and finishes, using metal spray paint for an authentic steampunk look. The device can be stored in a wooden box for safekeeping.
Unleash your creativity as you embark on a journey through time with this DIY time travel device. Start by gathering materials such as a wooden base, gears, leather straps, and metal accents. Arrange these components on the base to create a unique and visually captivating design. Once you’re satisfied with the arrangement, secure everything in place using industrial strength glue or small screws.
Next, add a touch of steampunk charm by applying a metal spray paint to the device. Choose a metallic shade that complements the overall aesthetic you’re aiming for. Experiment with different finishes like distressed or aged effects to give the device a truly vintage look.
Finally, store your time travel device in a wooden box for safekeeping when not in use. This not only adds a touch of authenticity but also protects your creation from dust and potential damage. You can even customize the box by adding a brass nameplate or engraving intricate designs on the wooden surface.
Custom Candle Holders
Enhance the ambiance of your steampunk-inspired home with custom candle holders. These unique and budget-friendly DIY projects allow you to add a touch of retro elegance to your decor. Using decorative keys, retro tissue paper, and black paper cord, you can create stunning candle holders that exude a golden glow reminiscent of the past.
Start by gathering the necessary materials. Look for decorative keys with intricate designs, as they will be the focal point of your candle holders. Retro tissue paper in rich colors and patterns will enhance the vintage aesthetic. Lastly, black paper cord will add an elegant finishing touch.
To begin the project, wrap the retro tissue paper around a glass jar or cylinder, securing it with black paper cord. This will create a textured and visually appealing base for your candle holder. Next, attach the decorative key to the front of the jar using strong adhesive. Make sure to position it in a way that allows the candle’s light to shine through the key’s openings, creating a captivating shadow pattern.
Once the adhesive has dried, place a candle inside the jar and light it to admire the warm and inviting glow. These custom candle holders can be arranged in clusters on a mantel or used as stunning centerpiece accents for a steampunk-themed dinner party. Let your creativity flow and experiment with different key designs and tissue paper patterns to create a unique set of custom candle holders that truly reflect your personal steampunk style.
| Materials | Instructions |
|---|---|
|
|
Retro Headphones
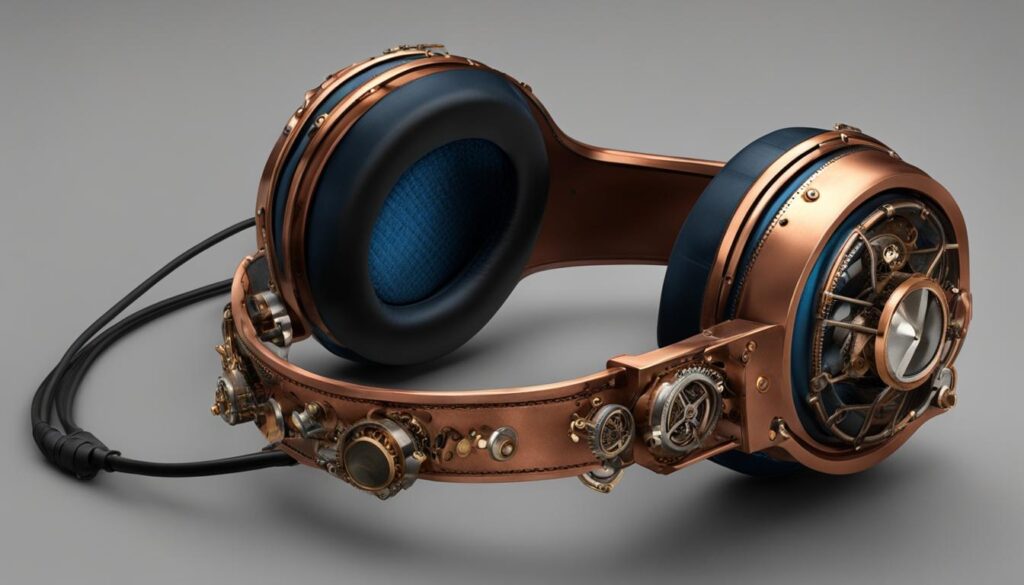
Transform a pair of vintage headphones into a steampunk-inspired accessory by combining them with the speakers of a new set. Embrace the fusion of vintage style and modern technology with this DIY project. Begin by hunting for older headphone brands like Western Electric or Newcomb at thrift or antique shops. These brands often have the classic aesthetic that aligns perfectly with the steampunk genre. Once you have your vintage pair, it’s time to disassemble them and transplant the modern elements, such as the foam cups, into the vintage headphones.
Experiment with different styles and eras by mixing and matching elements from various headphones. Play with textures and finishes to create a truly unique piece. You can spray paint the metal parts with a metallic brass or copper color to achieve an authentic steampunk look. Be sure to protect the delicate vintage components during the process.
By combining vintage headphones with modern speakers, you can enjoy the best of both worlds – a retro aesthetic with high-quality sound. Whether you’re an avid steampunk enthusiast or simply love the vintage charm, this project allows you to create a one-of-a-kind accessory that showcases your unique style.
| Materials | Tools |
|---|---|
| – Vintage headphones | – Screwdriver set |
| – Modern headphone speakers | – Wire cutters/strippers |
| – Spray paint (brass or copper color) | – Hot glue gun |
| – Protective gear (mask, gloves) | – Foam adhesive |
Ruffle Cuffs
Looking to add a touch of elegance to your steampunk ensemble? Try making your own ruffle cuffs! These DIY fabric accessories are the perfect way to elevate your outfit with a hint of Victorian charm. Plus, they’re incredibly easy to create.
To start, gather your materials: ruffled fabric strips of various sizes and colors, a sewing machine, and D-rings for fastening. The ruffled fabric strips can be easily found at fabric stores or repurposed from old garments. Choose fabrics with different textures to add depth and visual interest to your cuffs.
Once you have your materials, set up your sewing machine with a ruffler foot. This handy accessory allows you to gather fabric quickly and efficiently, saving you time and effort. Sew the ruffled fabric strips together, alternating the sizes and colors to create a visually dynamic cuff.
Finally, wrap the cuffs around your wrists and secure them with D-rings. Adjust the tightness to your liking, and voila! You now have a pair of stylish and unique ruffle cuffs to complete your steampunk look. Whether you’re attending a convention or simply want to add a touch of steampunk to your everyday style, these DIY fabric ruffles are the perfect accessory.
FAQ
What materials can I use to create steampunk crafts?
Steampunk crafts often incorporate materials such as brass, leather, metal, and antiques to achieve a unique and edgy look.
What is a good project for experimenting with different textures and finishes?
Creating a handheld time travel device using wood, leather, and metal odds and ends allows you to explore different textures and finishes. Consider using metal spray paint for an authentic steampunk look and store the device in a wooden box for safekeeping.
How can I add a steampunk touch to my home decor?
Custom candle holders made from decorative keys, retro tissue paper, and black paper cord can add a throwback golden glow to your steampunk home. These candle holders are easy to make and can be sourced from online steampunk crafts shops.
Can I combine vintage style with modern technology in steampunk crafts?
Absolutely! Transform a pair of vintage headphones into a steampunk-inspired accessory by combining them with the speakers of a new set. Look for older headphone brands like Western Electric or Newcomb at thrift or antique shops to add a touch of retro charm to your project.
How can I add flair to my steampunk outfit?
Ruffle cuffs can be easily created by sewing ruffled fabric strips of different sizes together. Use a sewing machine with a ruffler foot for efficient gathering of fabric. Finish off the cuffs by wrapping them around your wrist and securing them with D-rings, and you’ll have a stylish accessory to complement your steampunk attire.
